- June 2, 2020
- Posted by: admin
- Category: AI, Artificial Intelligence, Automation, Azure, Azure Cognitive Services, Azure Form Recognizer, Business Process Automation, Business Process Management, Cloud, Cloud Computing, Cognitive Services, Digital, Digital Transformation, Document Management, Flow, Form Recognizer, Microsoft Flow, Power Apps, Power Automate, Power Platform, Productivity, SharePoint
This being the last of this blog series, we pick up from where we left off. We’ll set up Power Automate, integrate Form Recognizer and run a sample test.
Below are the links to the other parts of this blog series: –
- Part I: Introduction and setting up the Form Recognizer resource on Azure
- Part II: Training the Form Recognizer model and setting up a Document Library on SharePoint
Step 4: Power Automate (Microsoft Flow) Setup
Power Automate, formerly known as Microsoft Flow, is a cloud-based software that allows you to create and automate workflows and tasks across multiple applications and services without help from developers.
In our case, we want a situation where information is automatically extracted from a document once it lands in the library. For this to be possible, we need to create a flow that is triggered when a file is created.
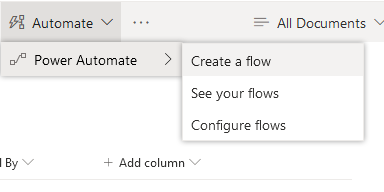
To create a flow, go to the team site where you want to create a new document library. On the menu bar, select Automate, then Power Automate and then select Create a flow.
A pop-up will appear on the right side with a list of templates from which you may create a flow.
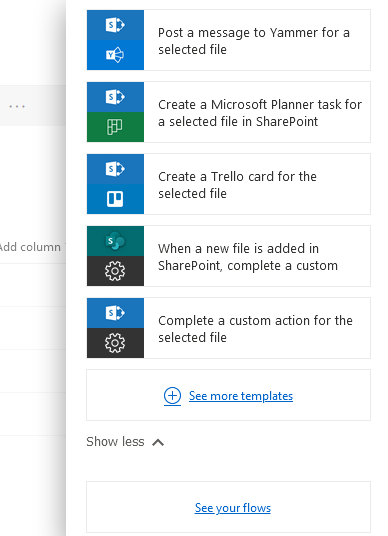
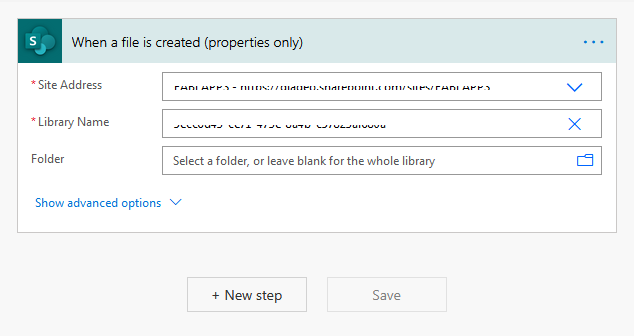
You will need to scroll through the templates to find the ‘When a new file is added in SharePoint’ template and select it. This will launch a page where we will begin creating the flow’s steps.
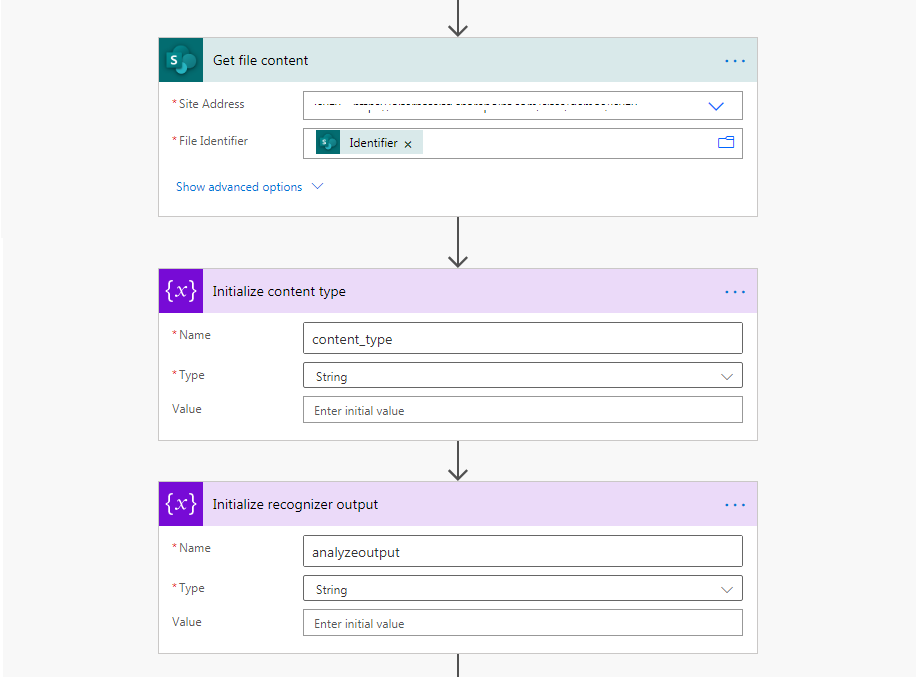
We then insert steps that get the file contents and initialize variables that we will need later in the flow.
My choices of variables are: –
- content_type which will hold the content type of the file, and will later be passed to the form recognizer request
- analyzeoutput which will hold the result from form recognizer before further action is taken on it e.g. saving to a custom list column
 Flow steps
Since we only need to send files that are either pdf or images to form recognizer, we have to filter the type of file. Therefore, we insert a conditional step that checks the file extension, and another that assigns a value to content_type based on the file extension.
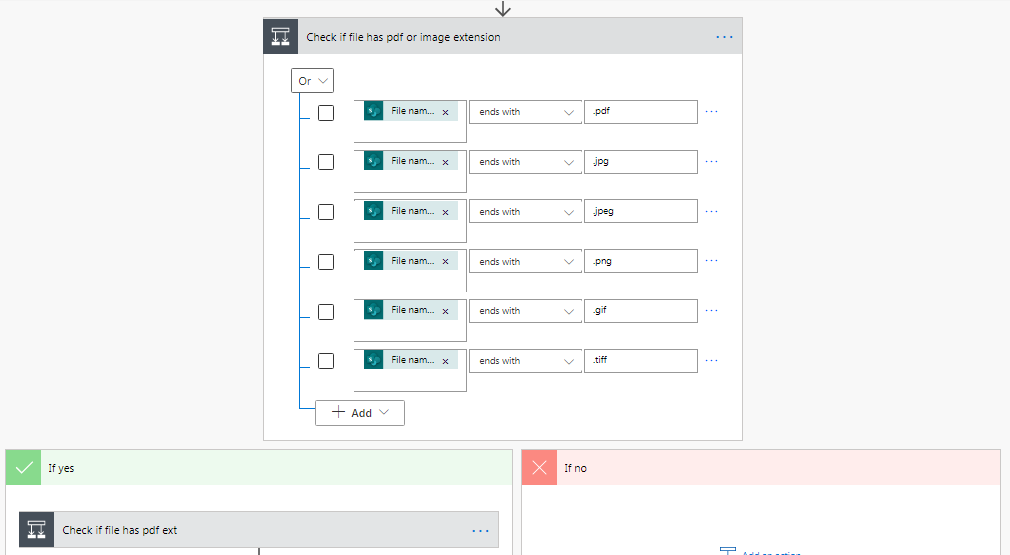 Check file extension
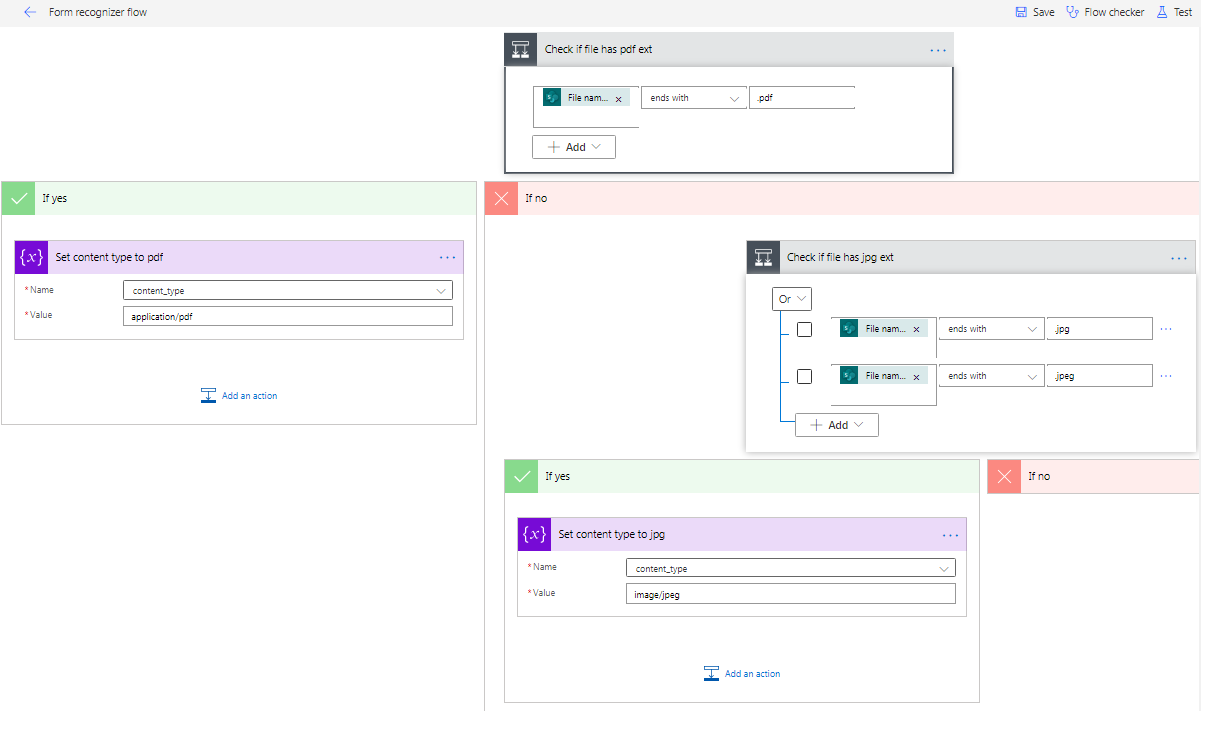 Assign content type
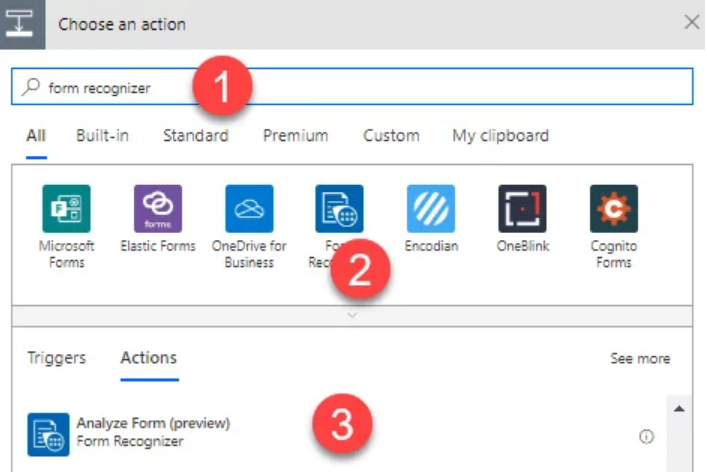
So now we have a dynamic value in our content_type variable. Let’s now add the Analyze Form task, just search for the “Form Recognizer” and then select the action Analyze Form.
 Form recognizer step
The flow will then ask you to provide your Azure form recognizer details i.e. Connection name, URL and account key.
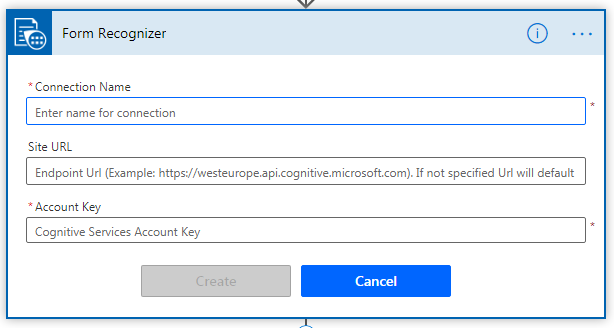 Form recognizer connection details
Once you provide that, another dialog is shown where you are required to provide a model ID (ID of the model we trained). We also provide the content_type variable here as part of the request. In the end, this is how our Analyze Form action will look like.
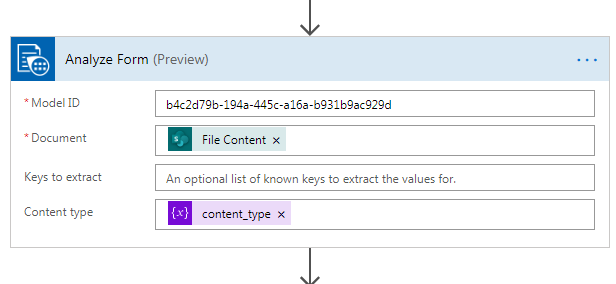 Analyze form
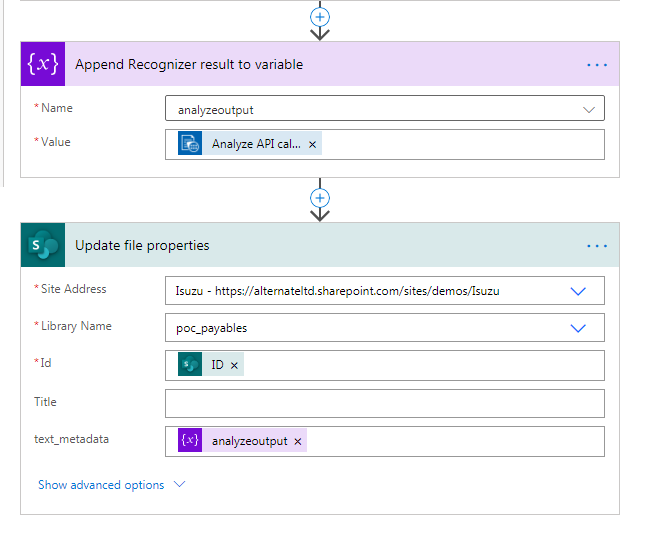
We then append the result from the Analyze Form to the analyzeoutput variable.
Finally, we use the analyzeoutput variable to update the custom column we had added to the document library. In my case, the column is named text-metadata.
Step 5: Test run the flow
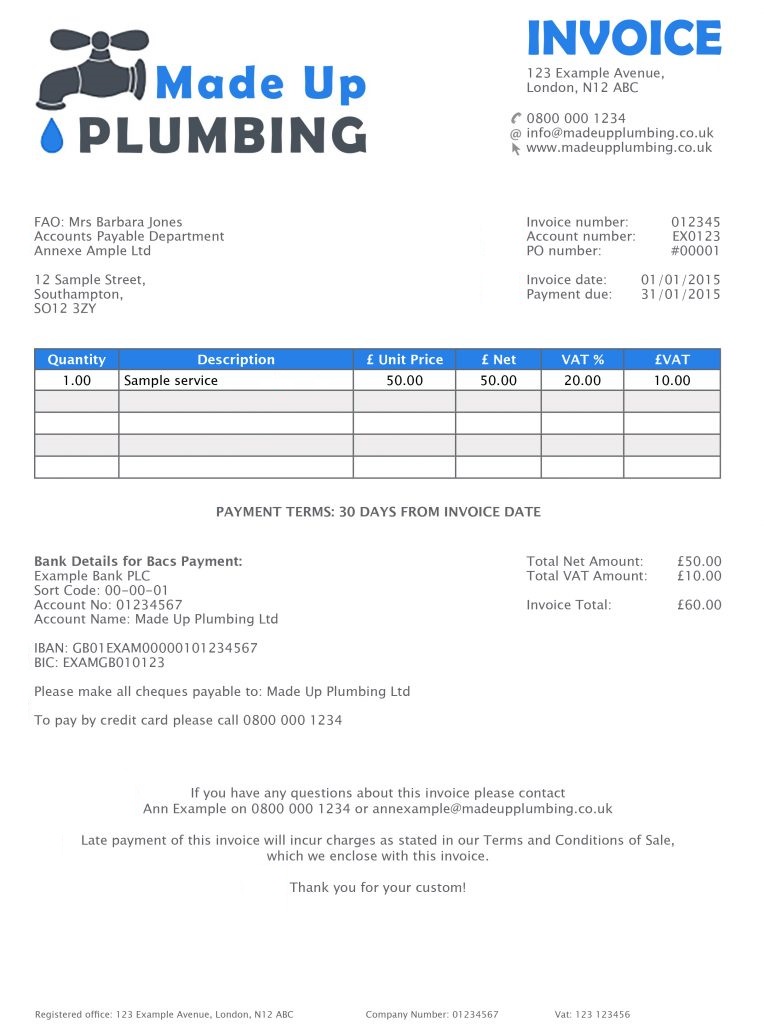
Once the above steps are successfully completed, save the flow and assign it a name. To test the flow, upload a scanned PDF or image document to the Document Library and observe what happens.
Below is a sample that I used.
After a few seconds, we will notice that the custom column that we had earlier added to our document library will be updated with a lengthy string. This string is the output from form recognizer that has been extracted from the uploaded document.
Below is a sample output extracted from the document above.
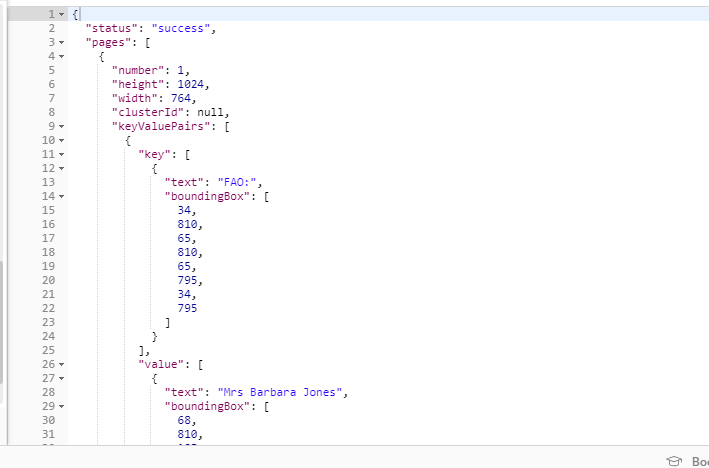 Form recognizer output
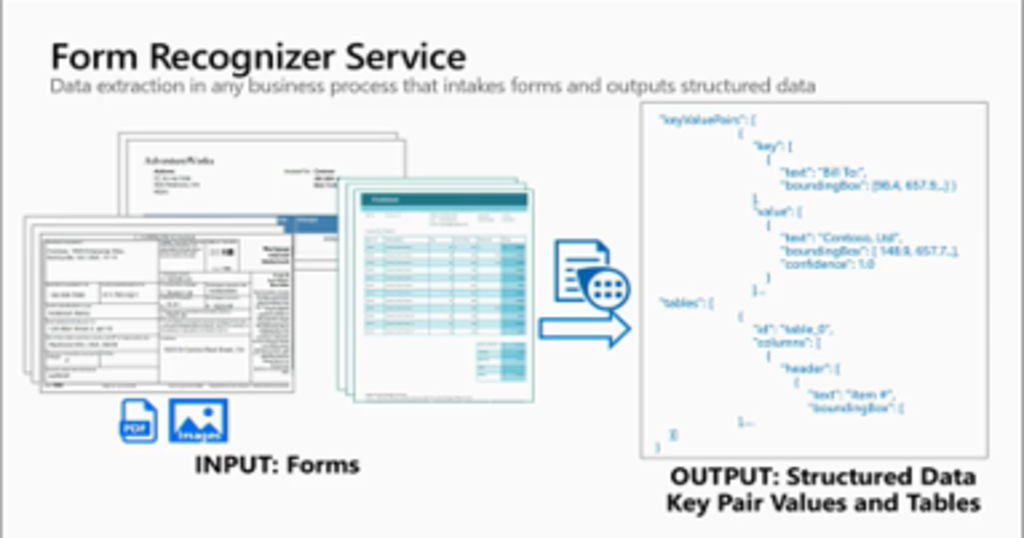
As you can see, the output object has a status key that indicates either success of failure.
Our focus should also be the “keyValuePairs” key under “pages”. Here, keyValuePairs is an array of objects which consist of key, value pairs. The “key” is an object relating to a label text and “value” is also an object relating to text corresponding to the label, alongside with their bounding box coordinates.
With this in mind, we can decide to edit the flow and make a targeted retrieval of data. This can be achieved by utilizing Power Automate’s loop feature, and looping through the keyValuePairs dataset until we encounter a key with text that matches our target and retrieving its corresponding value text.
Use cases
1. Intelligent and Automated search indexing of non-text documents
The above integration can be used to easily find information from documents that would otherwise not be searchable, and automatically update metadata and/or search indexes relating to it. This will in turn result to an improved search feature that covers a wide range of documents.
2. Automated notification after document processing
Depending on the type of document being processed, documents that require feedback, such as invoices, can be passed through the above process and contact information retrieved. A notification can then be sent to these contacts with an update of their status.