- May 27, 2020
- Posted by: admin
- Category: AI, Artificial Intelligence, Automation, Azure, Azure Cognitive Services, Azure Form Recognizer, Business Process Automation, Business Process Management, Cloud, Cloud Computing, Cognitive Services, Digital, Digital Transformation, Document Management, Flow, Form Recognizer, Microsoft Flow, Power Automate, Power Platform, Productivity, SharePoint
This week we pick up from where we left off — after setting up the Form Recognizer resource on Azure we’ll now work on training the Form Recognizer model and setting up a Document Library on SharePoint.
Below are the links to the other parts of this blog series: –
- Part I: Introduction and setting up the Form Recognizer resource on Azure
- Part III: Power Automate and then testing out the entire set up
Step 2: Train form recognizer model
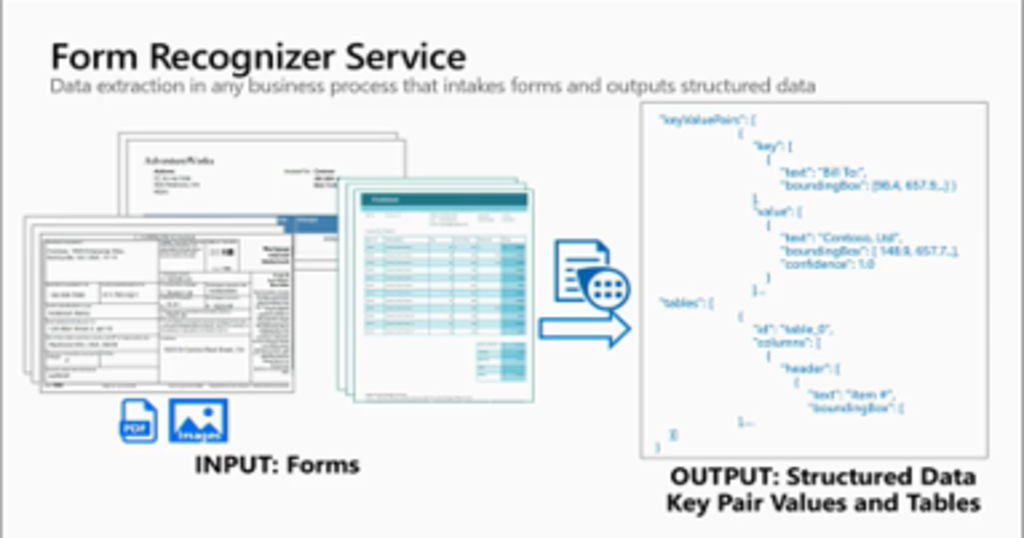
In the introduction section, we pointed out that Form Recognizer uses models to make intelligent extraction. Before a model is used in the extraction process, it needs to be trained first. In our case, we will be using the custom model, without labels.
A model can be trained using the provided Web UI Console, Curl or any HTTP request tool (in our case, we will use postman).
Training a model requires an Azure Storage account to be set up, and a set of training data uploaded to it. As per the documentation, we will need to prepare a minimum of five filled-in forms (PDF documents and/or images) of the same type/structure as your main input data. Or, a single empty form and two filled-in forms. The empty form’s file name needs to include the word “empty.”
The numbered steps below will act as a step by step guide on how to train a model.
Step 2.1: Setup Azure Storage Account and Upload Blob
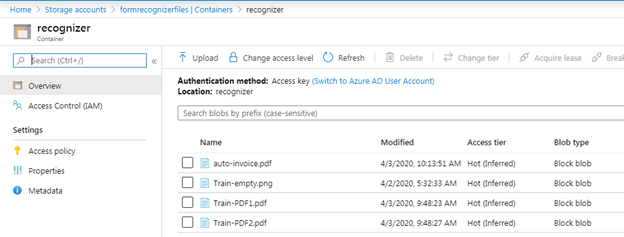
Login to Azure and create an Azure Storage account. Go to the created resource and click on the Containers, under the Blob service menu. Now we need to create a container where we will save the sample blob files inside. I created a container with the name “recognizer” and then uploaded some files, as shown below.
Step 2.2: Get the SAS URL
We now need to get the Azure Blob storage container’s Shared Access Signature (SAS) URL, which will be used when training our model. To retrieve the SAS URL, open the Microsoft Azure Storage Explorer, right-click your container, and select Get shared access signature.
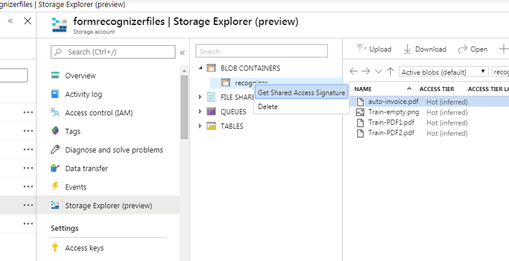
Get shared access signature
In the resulting form, as shown below, make sure the Read and List permissions are checked, and click Create.
 Below is the result of the generated SAS information.
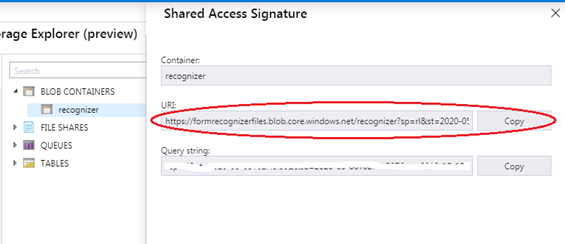 Generated SAS URL
Then copy the value in the URL section. It should have the form:
https://<storage account>.blob.core.windows.net/<container name>?<SAS value>
where: –
- <storage account> is the storage account name, in my case formrecognizerfiles
- <container name> is the blob container name, in my case recognizer
- <SAS value> is the generated query string
Step 2.3: Training the model
To train a Form Recognizer model with the documents in your Azure blob container, call the Train Custom Model API by running the following cURL command.
| curl -i -X POST | https://<Endpoint>/formrecognizer/v1.0-preview/custom/models |
| -H | Content-Type: application/json |
| -H | Ocp-Apim-Subscription-Key: <subscription key> |
| –data-ascii | { <body>} |
Before you run the command, make these changes:
- Replace <Endpoint>with the endpoint obtained after Form Recognizer subscription
- Replace <subscription key>with key1 copied after Form Recognizer subscription
- Replace <body> with a json string in the format of:
| {
“source”: “<SAS URL>”, “sourceFilter”: { “prefix”: “<Training files prefix>”, “includeSubFolders”: <boolean true| false > }, “useLabelFile”: <boolean true| false > } |
- “source” value is the most important here. Replace <SAS URL>with the URL generated from the “Get the SAS URL” step
- “sourceFilter” value is optional and specifies the condition to be observed when training the model. “prefix” refers to the value which the names of files being used to train the model should begin with. “includeSubFolders” simply instructs the API whether to include subfolders within the container when looking for the files with which to train the model.
- “useLabelFile” is for specifying whether the training should be done using Labels or not. In our case, this is irrelevant since we are training without labels
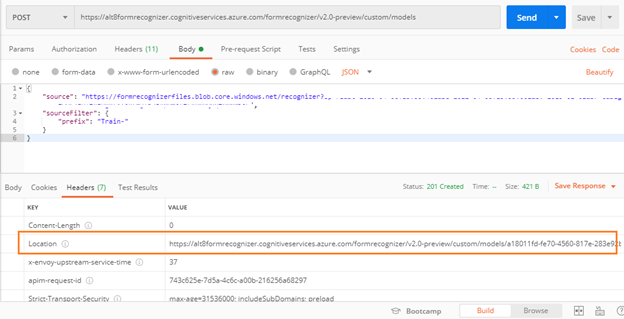 Train model request
After making the train model request, we receive a 201 (Success) response with a Location header. The value of this header is the URL to the new model being trained and contains its ID. It is in the format of:
https://<Endpoint>/formrecognizer/v2.0-preview/custom/models/<model ID>
where: –
- < Endpoint > is the Form Recognizer subscription endpoint
- < model ID> is the trained model ID
Step 2.4: Get training results
This section simply checks the training status of the above request by sending the following request:
| curl -i -X POST | <Trained model location> |
| -H | Content-Type: application/json |
| -H | Ocp-Apim-Subscription-Key: <subscription key> |
Where <Trained model location> is the Location header from the training model step
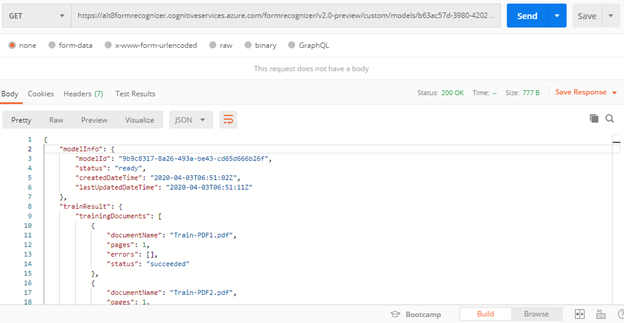 We’ll receive a 200 (Success) response with a JSON body as shown in the above image. The “status” field will have the value “ready” once training is complete. If the model is not finished training, you’ll need to query the service again by rerunning the command. Microsoft recommends an interval of one second or more between calls. The “modelId” field contains the ID of the model we have trained. We’ll need this for the subsequent steps.
Step 3: Create Document Library
A library is a location on a site where you can upload, create, update, and collaborate on files. We will need a storage area for our files before form recognizer acts on them, therefore we will create a document library in our preferred team site.
Step 3.1 How to create a document library
- Go to the team site where you want to create a new document library.
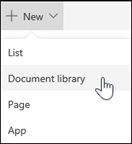
- On the menu bar, select New, and then select Document library.
- Enter a name for the new library.
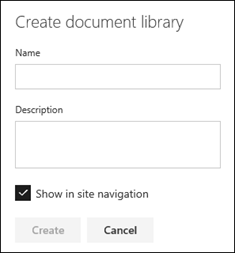
- Select Create.
After the library has been created, add a custom column to the Library which will hold the extracted data returned by form recognizer.
Next in Part III and the final part of this blog post series, we will look at how you set up Power Automate and test the entire setup. See you next week for that.
We are a group of volunteers and opening a new scheme in our community.
Your website provided us with valuable information to work on. You have done an impressive job and our whole community will be
thankful to you.
It’s really a cool and useful piece of information.
I am satisfied that you simply shared this helpful info with us.
Please stay us informed like this. Thank you for sharing.